
Welcome to the wonderful world of The Ultimate Guide to DIY martha tent. If you’re looking for a creative and cost effective way to enjoy the great outdoors, then making your tent is an adventure waiting to happen.
Whether you’re an experienced camper or just starting, crafting your very own DIY Martha Tent will not only save you money but also give you the satisfaction of creating something unique.
In this ultimate guide, we’ll explore the benefits of making your tent and provide you with a list of tools and materials needed to get started on this exciting DIY project.
So let’s dive in and discover how to unleash your inner camping enthusiast with a DIY Martha Tent.
Benefits of The Ultimate Guide to dIY martha tent:
Follow these benefits you can easily enjoy your camping trips;
Customization:
One of the major advantages of making your DIY martha tent is the ability to customize it according to your specific needs and preferences. Whether you want extra pockets for storage, a larger sleeping area, or even unique design elements, DIY allows you to create a tent that suits your camping style perfectly.
Cost Savings:
Buying a pre-made tent can be quite expensive, especially if you’re looking for high-quality materials and features. By opting for a DIY approach, you have the opportunity to save money by sourcing materials yourself and only paying for what you need.
Learning Experience:
Building your tent provides an excellent learning experience in terms of understanding construction techniques and problem solving skills. It allows you to develop practical knowledge about tents’ structural integrity and durability while gaining confidence in your abilities as a camper.
Sense of Accomplishment:
Completing a DIY project like building a tent gives an immense sense of accomplishment and pride in creating something with your own hands. It adds value to every camping trip knowing that the shelter providing comfort at night was crafted by none other than yourself.
Sustainability:
In today’s environmentally conscious world, crafting your tent can also contribute positively towards sustainability efforts since it reduces waste from mass-produced items. You have control over choosing eco-friendly materials which aligns with reducing environmental impact during camping trips.
Tools and Materials Needed for DIY Martha Tent:
In this ultimate guide to DIY Martha tents, we have explored the benefits of making your tent and now we discussed the tools and materials needed for this project. By taking on this DIY adventure, you not only save money but also get the satisfaction of creating something unique. The versatility and functionality of DIY Martha tents make them perfect for various outdoor activities.
To start your DIY journey, gather essential tools like a drill, saw, measuring tape, and hammer. As for materials, you will need PVC pipes or wooden poles as the frame, durable fabric like canvas or nylon for the coverings, stakes to secure the tent to the ground, and ropes or bungee cords to reinforce stability.
Customize your tent according to your needs by adding windows or ventilation openings. With some creativity and patience, you’ll soon enjoy cozy nights under starry skies in your homemade DIY Martha tent.
So grab those tools and materials today and embark on an exciting DIY project that will not only provide shelter but also create lasting memories.
Step-By Step Guide To The Ultimate Guide to dIY martha tent:
By following these step-by-step instructions, you’ll be able to create a stunning DIY Martha Tent that reflects your personal style while providing comfort in any setting. So gather your materials and let’s embark on this exciting project together.
Choosing the right fabric for your DIY Martha Tent is crucial to ensure durability and functionality. A sturdy of outdoor fabric like canvas or polyester that can withstand different weather conditions. Consider the color and pattern that will complement your overall aesthetic.
Next, it’s time to measure and cut the fabric according to your desired tent size. Make sure to leave extra space for seam allowances. Use a ruler or measuring tape to get accurate measurements, ensuring that all sides are equal.
When it comes to sewing techniques, start by hemming the edges of the fabric panels using a straight stitch on your sewing machine. This will prevent fraying and give a neat finish. Then, sew the panels together following your measurements, creating seams at each corner.
Adding support poles and accessories will give structure and stability to your Martha Tent. Choose lightweight yet sturdy materials like PVC pipes or bamboo rods as support poles. Attach them securely at each corner of the tent using connectors or rope ties.
Add those finishing touches that will elevate the look of your DIY Martha Tent. Consider adding decorative elements such as tassels, ribbons, or fairy lights along the edges for an enchanting touch.
Tips and Tricks for a Successful DIY Project:
When it comes to embarking on a DIY project like creating your Martha Tent, preparation is key. Start by gathering all the necessary materials and tools before you begin. This will save your time and prevent any frustrating interruptions during the construction process.
Next, take the time to carefully read through the instructions or tutorials for building the tent. Understanding each step beforehand can help prevent mistakes and ensure a smoother assembly process.
Measure twice, cut once. Accuracy is crucial when working on any DIY project. Double-check your measurements before making any cuts or adjustments to avoid costly errors.
Don’t be afraid to get creative with your design. The Martha Tent offers endless possibilities for customization. Consider adding unique embellishments like fairy lights, ribbons, or even painting designs onto the fabric for a truly personalized touch.
Patience is key throughout this DIY Martha Tent journey. Take breaks as needed and don’t rush through each step quality craftsmanship takes time.
Maintenance and Care for Your Martha Tent:
By following these maintenance practices, you can enjoy many years of delightful adventures with your beloved Martha tent.
Keeping your Diy Martha tent in tip-top shape is essential to ensure its longevity and optimal performance. Here are some key maintenance tips to help you take care of your beloved DIY creation.
Always inspect the tent before each use. Check for any signs of damage or wear and tear, such as ripped seams or holes. Repair these promptly using appropriate materials like patch kits or adhesive tape designed specifically for tents.
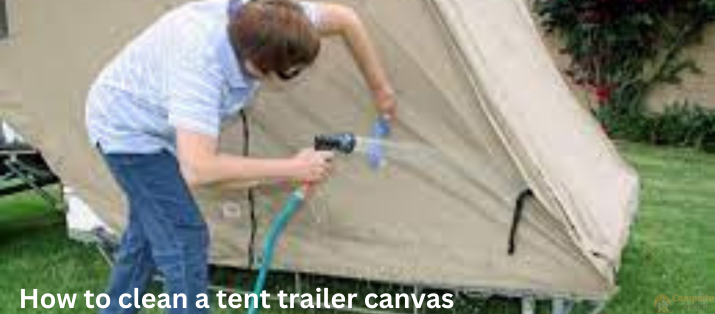
Next, it’s important to clean your DIY Martha tent regularly to prevent dirt, grime, and mildew buildup. Start by gently sweeping away any debris with a soft-bristle brush or broom. For more thorough cleaning, use a mild soap solution and a sponge or cloth to wipe down the exterior surfaces. Avoid using harsh chemicals that could potentially damage the fabric.
When storing your tent, make sure it is completely dry to prevent mold growth. Air-dry it thoroughly after cleaning before packing it away in a well-ventilated area. Consider investing in a storage bag designed specifically for tents to protect it from dust and UV rays when not in use.
Be mindful of where you set up your DIY Martha tent. Choose level ground free from sharp objects that could puncture the fabric. If possible, place a tarp underneath as an additional layer of protection against moisture.
Creative Ways to Use Your Martha Tent:
As you can see, there are countless creative ways to use your Diy Martha Tent! Whether it’s hosting a backyard movie night with friends and family or creating a cozy reading nook for yourself, the possibilities are endless. You could even set up the tent as a unique dining area for special occasions or transform it into a magical play space for kids.
Conclusion
Building a DIY Martha tent is a fun and cost effective way to create your own personal oasis. With the right materials, tools, and techniques, you can easily construct your own outdoor retreat that will provide shade, shelter, and style for any event or occasion. From backyard parties to camping trips, this versatile tent is sure to impress with its simplicity and functionality. So why wait? Grab your supplies and get started on building your very own DIY Martha tent today! Your friends and family will be amazed by your handiwork and you’ll have a go-to spot for all of your outdoor gatherings.
FAQS:
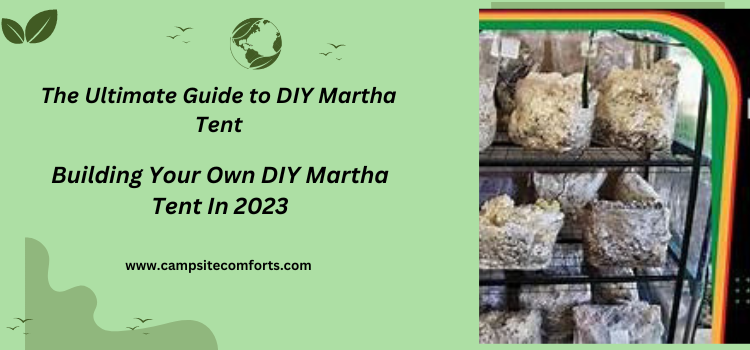
How often should the fan run in the Martha tent?
Start with turning on your fan for 15 minutes every 4 hours if your timer is older and only goes up to 15 minutes, then adjust as necessary. A more precise method that maintains your Martha Tent inside a designated CO2 range is offered by a CO2 controller.
How often do you vent a Martha tent?
Fruiting mushrooms requires FRESH AIR EXCHANGE. To allow air to enter the tent from the bottom and exit the top, a tiny fan can be positioned at the top. For best results, turn on a 3-inch low-power fan for about one minute every ten to twenty minutes. EXHAUST OR FILTER: NO Spores Indoors!
Should the fan be placed on Martha’s tent’s top or bottom?
Just position your fan so that its exhaust end faces the back of the tent on the top shelf. Run the wires beneath the plastic greenhouse bottom and along the back.

Hello, i think that i saw you visited my web site thus i came to “return the
favor”.I am attempting to find things to improve my site!I suppose its ok to use some of your ideas!!